 |
| A collection from our travels |
Saturday, October 29, 2011
COOLERS
As we have now traveled roughly halfway around the world it's amazing to look in some of the cabinets at what has been collected. These beer coolers fit sizes from Aussie stubbies to Mexican ballena's [sp] and most any can or bottle in between.

PAINT and FUN
DANGA BAY MARINA 01° 23 N 103°43 E
Yes we're still here in Danga Bay, Malaysia and I'm trying some new format on the blog so with luck you will also see a google map, you may have to click the location at the bottom of the posting,along with the above latitude and longitude. Trying to learn this computer stuff at an advanced age is tough. This new format also has a different method of inserting photos along with captions. Here we go!!!!
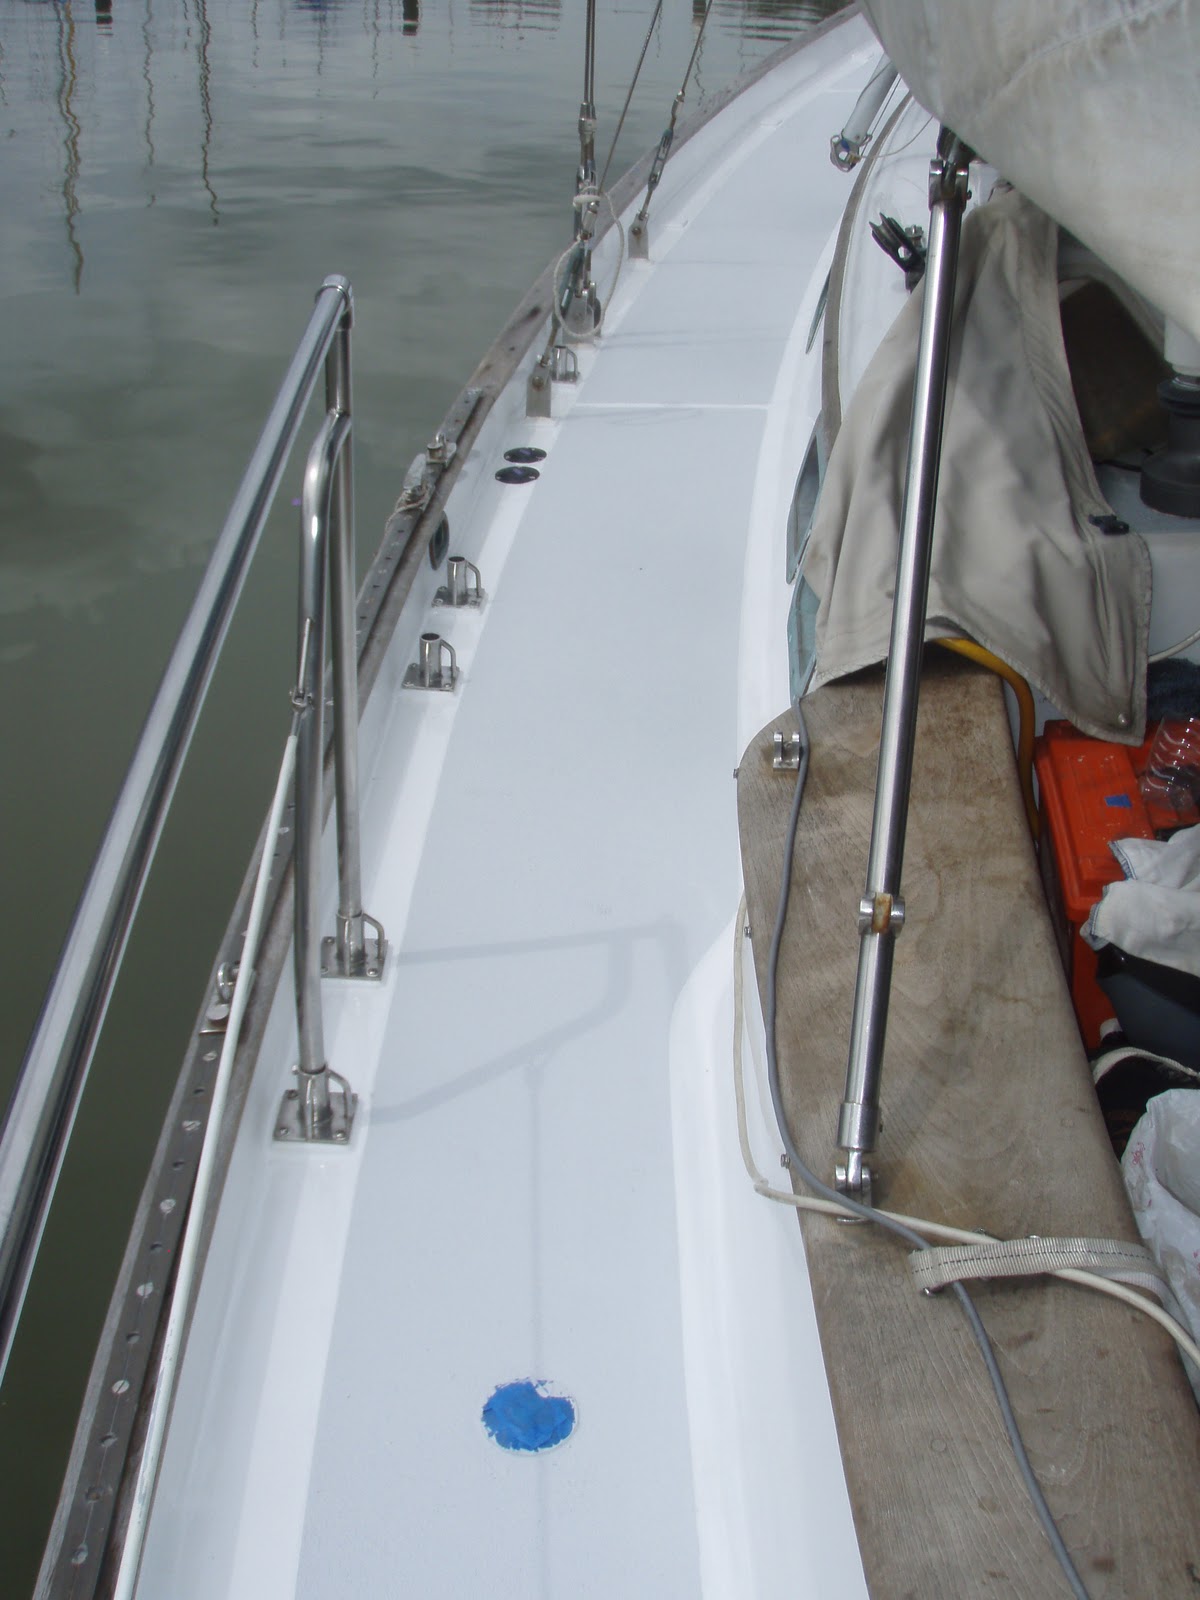
So I now have been trying to insert and move photos per the site help file but it's not going as planned. Here is what the paint is looking like. You'll notice that further forward only the stanchion bases are in place. We removed most all of the deck hardware to paint. It was also time to re-bed things as we were beginning to have some leaking spots.
 |
| Port side |

 |
Starboard side which was finished today
|
As we had been docked port side to we turned the boat around in it's slip so after painting we would not have to walk on that part. Once the paint cured the boat was again turned around and today we put the finish coat of non-skid on the starboard side.
 |
| Kathy cleaning one one of the anchor rollers |
Continuing along I seem to be making progress in figuring this format out but not sure how. It's actually now taken two days.
Our last outside paint for now will be the cockpit which we hope to get started on in the next day or so. With the deck hardware removed it was a good time for lots of cleaning and polishing. This was Kathy's job using bronze wool, brasso and lots of elbow grease. Tomorrow we will set the stanchions back in the bases on port and get the lifelines back on. The starboard will be done after another few days of paint curing.

The final match was played last Sunday between New Zealand
and France.There was a crowd of about 30 gathered for the match
which was won by the All Blacks of New Zealand. A good time was had by all.
 |
| that's a mug of beer |
 |
| Kathy along with Rick and Robin of "Enadangered Species" |
 |
| Rick "Endangered Speciesand Dick "Wind Pony" enjoying a beer |
That wraps up this edition.
Monday, October 10, 2011
LEAKS
DANGA BAY MARINA 01° 23' N 103° 43' E
Here just north of the equator we get some rain most every day and sometimes it's quite heavy.
So just like a house we at times develop leaks. The other afternoon during a period of cats and dogs falling from the sky we noticed some drips in two different areas. At the time we did a bit of searching and located one that would be an easy fix but were unsure of the source of the other which was causing water to come thru the cabinet which houses all of our radios. Not good!!
The next day using a water hose I directed the stream to potential areas as Kathy watched for the leak to reappear. "Eureka"! It was a portlight, one of the fourteen that we have. It has been since 2001 since we last pulled the frames off and fixed leaks, so I guess it's time again.
 This was the quick temporary fix for the day.

After ten years some of the screws broke off to be dealt with later.

Next removal of the frame.

Here's the portlight with the frame removed. Not only did I drill out the broken screws but also the holes for the others. My next step was to use epoxy and dowels to fill the holes and void areas.
 The dowels were then cut off flush with the cabin top and the face frame installed again. We use a very sticky, goey material between the frame and cabin top as a barrier to keep the water out.
 This isn't truely the finished product but the start of removal of the frame. Hey I just didn't manage a finish photo as I needed to move onto what I should have been spending the last few days working on. Removal of deck hardware so painting can continue. You'll see more on that in our next edition.
Here just north of the equator we get some rain most every day and sometimes it's quite heavy.
So just like a house we at times develop leaks. The other afternoon during a period of cats and dogs falling from the sky we noticed some drips in two different areas. At the time we did a bit of searching and located one that would be an easy fix but were unsure of the source of the other which was causing water to come thru the cabinet which houses all of our radios. Not good!!
The next day using a water hose I directed the stream to potential areas as Kathy watched for the leak to reappear. "Eureka"! It was a portlight, one of the fourteen that we have. It has been since 2001 since we last pulled the frames off and fixed leaks, so I guess it's time again.
 This was the quick temporary fix for the day.
After ten years some of the screws broke off to be dealt with later.

Next removal of the frame.

Here's the portlight with the frame removed. Not only did I drill out the broken screws but also the holes for the others. My next step was to use epoxy and dowels to fill the holes and void areas.
 The dowels were then cut off flush with the cabin top and the face frame installed again. We use a very sticky, goey material between the frame and cabin top as a barrier to keep the water out.
 This isn't truely the finished product but the start of removal of the frame. Hey I just didn't manage a finish photo as I needed to move onto what I should have been spending the last few days working on. Removal of deck hardware so painting can continue. You'll see more on that in our next edition.
One other thought since this portlight had just begun to leak what do you think has been added to the TO DO list. Thirteen more to portlights to re-do!!!
PROJECTS
DANGA BAY MARINA 01° 23N 103° 43E
Hey it's a FREE marina so we continue to stay here and do projects. We have one cabinet designated as the project locker and it's full of parts already bought for the future installations. Several years ago we purchased new deck fill fittings for fuel, water and waste. The original ones were very nice and heavy brass but alas the caps were bad and we were unable to find the correct ones so we bought new ones to be installed at a later date. Now prior to finishing painting the decks this was the time.
 Now things in a boat are not always the easiest to get to. To access the hoses for these deck fills first I had to empty the cookie cabinet.
 Once empty the shelf and back paneling was also removed.

On inspection we found a dead unwelcomed guest.
 This shows the hidden part of the locker with hoses, electrical wires and the "knee" brace with one of the chainplates bolted to it, that is part of what holds the mast up. Back in 2003 we replaced all the chainplates and had done extensive repair as the old wood which was encapsillated in the firberglass had gotten wet and rotten. All looks good now, except for some cleaning. You can see that one of the fills is no longer used and now we'll remove it and fill in the hole.

 I don't think these had been removed since the boat was built in 1979 and most of the screws broke off and had to then be drilled out.
 What a mess!

The unused hole has been filled with a wood plug and then fiberglassed over.

Here is the end result. These are both water fills. The outer side got the same treatment for a fuel and water fill and our other two fuel fills got changed out to. Now we can move along with the deck painting.
Hey it's a FREE marina so we continue to stay here and do projects. We have one cabinet designated as the project locker and it's full of parts already bought for the future installations. Several years ago we purchased new deck fill fittings for fuel, water and waste. The original ones were very nice and heavy brass but alas the caps were bad and we were unable to find the correct ones so we bought new ones to be installed at a later date. Now prior to finishing painting the decks this was the time.
 Now things in a boat are not always the easiest to get to. To access the hoses for these deck fills first I had to empty the cookie cabinet.
 Once empty the shelf and back paneling was also removed.
On inspection we found a dead unwelcomed guest.
 This shows the hidden part of the locker with hoses, electrical wires and the "knee" brace with one of the chainplates bolted to it, that is part of what holds the mast up. Back in 2003 we replaced all the chainplates and had done extensive repair as the old wood which was encapsillated in the firberglass had gotten wet and rotten. All looks good now, except for some cleaning. You can see that one of the fills is no longer used and now we'll remove it and fill in the hole.
 I don't think these had been removed since the boat was built in 1979 and most of the screws broke off and had to then be drilled out.
 What a mess!
The unused hole has been filled with a wood plug and then fiberglassed over.

Here is the end result. These are both water fills. The outer side got the same treatment for a fuel and water fill and our other two fuel fills got changed out to. Now we can move along with the deck painting.
Wednesday, September 28, 2011
PAINT and VARNISH
DANGA BAY MARINA 01° 23' N 103° 43' E
A month has passed and we have continued to keep very busy. Jerry has now turned over 95% of the varnish duties to Kathy and she is doing a fine job. My only remaining jobs are any heavy sanding necessary and brush cleaning. Currently all sanding is done by hand as our two power sanders died and due to the fact that all power tools here are 240 volt we're waiting for one that we bought online to be sent by the Kids.
 Kathy has masted the heat gun and scrapper. We have ten floor hatches and they were all taken down to bare wood and then 6 coats of clear varnish. Prior to varnishing I did also have to do some repair work as a number of the glue joints had come apart. More epoxy!!!
 Due to the potential of rain most every day all the hatches were done inside, meaning lots of moving stuff around. Once finished Kathy covered each hatch with paper until the whole cabin sole is finished.
 The guest room/v-berth looks more like a garage. Hey you have to store stuff somewhere.
 As Kathy works inside, in the air conditioning, I continue painting on the outside. the deck delamination repair took lots of time but finally the decks are solid. Next it was painting on the cabin top. After filling holes it was two coats of epoxy primer and today I finished the second coat of gloss. It's WHITE and GLOSSY!! Not perfect but it does pass the ten foot away test.
 We had to fashion a shade tarp for the outside work.
A month has passed and we have continued to keep very busy. Jerry has now turned over 95% of the varnish duties to Kathy and she is doing a fine job. My only remaining jobs are any heavy sanding necessary and brush cleaning. Currently all sanding is done by hand as our two power sanders died and due to the fact that all power tools here are 240 volt we're waiting for one that we bought online to be sent by the Kids.
 Kathy has masted the heat gun and scrapper. We have ten floor hatches and they were all taken down to bare wood and then 6 coats of clear varnish. Prior to varnishing I did also have to do some repair work as a number of the glue joints had come apart. More epoxy!!!
 Due to the potential of rain most every day all the hatches were done inside, meaning lots of moving stuff around. Once finished Kathy covered each hatch with paper until the whole cabin sole is finished.
 The guest room/v-berth looks more like a garage. Hey you have to store stuff somewhere.
 As Kathy works inside, in the air conditioning, I continue painting on the outside. the deck delamination repair took lots of time but finally the decks are solid. Next it was painting on the cabin top. After filling holes it was two coats of epoxy primer and today I finished the second coat of gloss. It's WHITE and GLOSSY!! Not perfect but it does pass the ten foot away test.
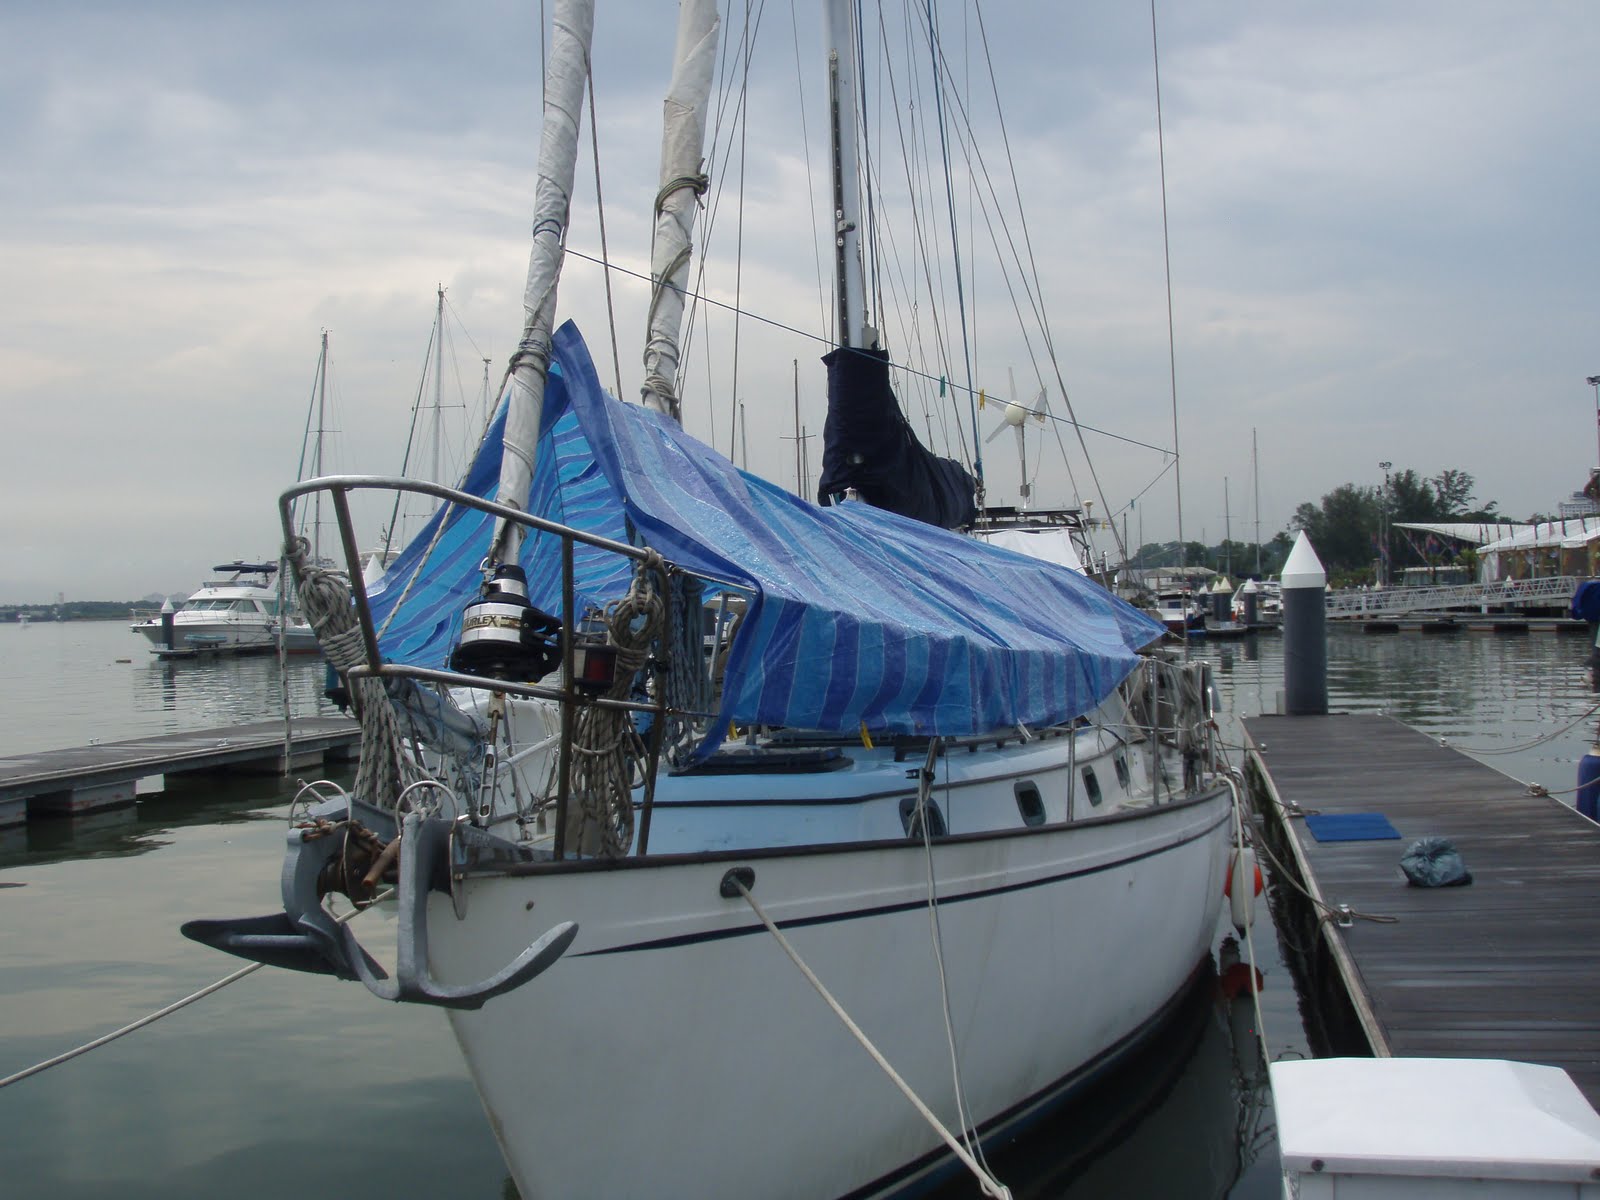 We had to fashion a shade tarp for the outside work.
 As Kathy finishes her varnish she then gets to start sewing new covers for the interior cushions. Another air conditioned job. Once the cabin top paint cures, seven days, we'll redo the non-skid and I get to work on the last part of the deck painting. This will be the gloss inside of the toe rail and more non-skid. In addition we will remove all the lifeline stanctions to make it easier to paint and that they need to be rebedded with new compound as some are leaking. So including the bow pulpit that eleven bases with four bolts each to be taken off and the replaced on each side. One side at a time means only 44 holes that can leak when it rains. I do have a plan for temporary plugs, we'll see how it works.
Now does anyone notice a detail that I have finally corrected? Hey there could be a valuable prize to whom ever comments about the change. Mel Tubbs, you're exempt from this one. More on that in the next edition.
Sunday, August 28, 2011
PAINTING, AT LEAST IT'S WHITE
DANGA BAY MARINA 01'23N 103'43E
Back in the late 1960's while working as a seasonal lifeguard I had the opportunity to assist in the painting of the California state lifeguard rescue boat "Surf Watch". I learned a lot about painting boats, thanks Mel. The expert painters would come by and say "at least it's yellow". Well now at least it's white or gray as I embark on the painting of Po oino Roa's cabin top and decks. This will all be done by brush and with the new two part polyurathane paints. Hey we live on a fixed income, so it's do-it-yourself.
 We have several power sanders aboard and then it was lots of hand sanding to prepare both the deck which would get new non-skid and the cabin top and other deck areas which get gloss.
 After sanding a coat of epoxy primer and then more sanding before two finish coats of white.

Lots of masking. We removed winches and other hardware but the handrails had to stay. Working in a boatyard and havinga storage container would make things easier.
 The cabin top and edges of the deck are done and better than before. Hey IT'S WHITE!!
 We've now masked off the non-skid areas and are ready to paint them. This was a two person job, one to apply the paint and another to roll in the non-skid texture. As each section was completed the tape needed to be pulled off.
 The cabin top was first then we moved on to the deck area.
 Kathy brushing on and then I would come along with the roller.
 This looks good, shiney white and a light gray for the non-skid.
 Where the new meets the old. As we work along in sections we're about a quarter of the way done. Before more painting we will finish on the deck delamination repair.
Nothing like another day in paradise!!!!
BUSY DAYS
DANGA BAY MARINA 01'23 N 104'43E
Yes we're still here in Danga Bay, hey I don't know of any other marina that's free so it makes a good spot to catch up on long neglected maintenance projects.
When we bought the boat ten years ago one of the notations made by the surveyor was delamination of the deck skin from the core. Think of the deck as a sandwich. Two skins of fiberglass with a wood core in the middle. In older boats it's common for the outer skin to delaminate from the core. Ours has done that in a number of places. I had previously made some repairs but lots more were necessary, so here we go.
 Out came the small circular saw and I cut out a rectangle. In the past I had cut two inch in diameter hole but this time I wanted to see what the core material truely was.
 On lifting the panel off we found five inch square pieces of plywood stuffed together and then bonded with resin. It looks as if during the manufacture they made use of all the scraps putting them in the core.
 For these sections we mixed up thinned epoxy resin and satuarated the core, then replaced the top section. After observing exactly what the core material was we went back to a simpler method of just drilling holes through the top skin and then injecting the epoxy mix into the holes.
 On injecting the epoxy there is a cappillary effect and the epoxy flows through the core material. you continue to mix more and inject until at last the holes fill. Next it's a layer of seran wrap and weights. Once the epoxy cures the soft delaminated spots are gone. At least for now.
 Now the deck is once again solid. Next will be some more filling to make it smooth and the re-paint and non-skid.
 We have been moving along a section at a time. now the aft deck is done.
Yes we're still here in Danga Bay, hey I don't know of any other marina that's free so it makes a good spot to catch up on long neglected maintenance projects.
When we bought the boat ten years ago one of the notations made by the surveyor was delamination of the deck skin from the core. Think of the deck as a sandwich. Two skins of fiberglass with a wood core in the middle. In older boats it's common for the outer skin to delaminate from the core. Ours has done that in a number of places. I had previously made some repairs but lots more were necessary, so here we go.
 Out came the small circular saw and I cut out a rectangle. In the past I had cut two inch in diameter hole but this time I wanted to see what the core material truely was.
 On lifting the panel off we found five inch square pieces of plywood stuffed together and then bonded with resin. It looks as if during the manufacture they made use of all the scraps putting them in the core.
 For these sections we mixed up thinned epoxy resin and satuarated the core, then replaced the top section. After observing exactly what the core material was we went back to a simpler method of just drilling holes through the top skin and then injecting the epoxy mix into the holes.
 On injecting the epoxy there is a cappillary effect and the epoxy flows through the core material. you continue to mix more and inject until at last the holes fill. Next it's a layer of seran wrap and weights. Once the epoxy cures the soft delaminated spots are gone. At least for now.
 Now the deck is once again solid. Next will be some more filling to make it smooth and the re-paint and non-skid.
 We have been moving along a section at a time. now the aft deck is done.
Subscribe to:
Posts (Atom)